


YEIDE
Milestone Three - Prototypes
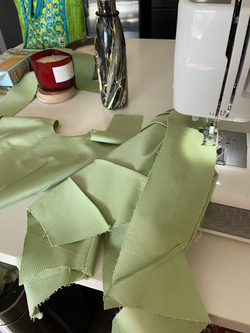
FIRST SAMPLE
While making this sample of the Carabo Top, I wasn't able to do top stitching or add the magnetic buttons on this sample. But I wanted to focus on the fit. I had to adjust the length of the straps so the seam would fall on the high point of the shoulder. I also had to adjust the sides because they flared out from my body a bit too much. I adjusted the pattern so my second sample would fit me better. I also did an iron print of my Yeide wavy print on a tote bag.
 |  |  |
|---|---|---|
 |  |  |
 |  |
SECOND SAMPLE
While making my second sample of the Carabo Top, I wanted the lining and the front fabric to be the same. So I used the updated patterns on the final fabric and cut 4 of every pattern piece or two pieces if It was to be cut on the fold. I pinned and ironed all of my pieces first and then started sewing. I wanted to make sure all the seams were enclosed and finished with topstitching and not have to use the serger to finish the side seams as I did on the first Garment. I topstitched and added embroidery to replicate braille, with my brand name, for the five buttons along the back. I added a magnetic bow that can be added or taken off based on what the wearer wants, and it's pre-tied for people with impaired hand mobility.
 |  |  |
|---|---|---|
 |  |  |
 |  |  |
 |  |

COBRA SWEATER SAMPLE
While Crocheting this sweater I started with a strip for the front and the back that were the same width and length. Then I started crocheting the sleeves which was starting with a thinner dark blue yarn and I wanted them to have a slit in the bottom part of my sleeves so I didn't start crocheting a circular piece until I had the slit length I wanted. I switched between my thick light blue yarn and dark blue thin yarn two times alternating the size of the needle on the thin blue yarn so it would have more spacing. Once I attached the first sleeve I did with no counting or pattern just playing with it as I went. I didn't like how bulky it was. But I attached it anyway and started making the other sleeve. I originally had an idea to do alternating colors with a light blue thin yarn and a thick dark blue and have one sleeve be different from the other sleeve. Once I completed the opposite color sleeve I didn't like it at all so I went back to the craft store and bought my original color yarn. I made it shorter and tighter around my arm and less bulky towards the top. Once I attached the new sleeve I liked it so much better. So I carefully cut off the first Sleeve I made and made a fourth sleeve to complete the Cobra Sweater.
 |  |  |
|---|---|---|
 |  |  |
FINAL PROTOTYPE PHOTOS
Completed Carabo Top worn with the Cobra Sweater
